A knife is an indispensable survival tool in the wild. The blade should always be sharp since you’ll use the knife for various tasks, including preparing food, starting a fire, building a shelter, or skinning animals. But how do you sharpen your knives in the wild?
Here’s how to sharpen your knives in the wild in 5 easy steps:
- Find suitable sharpening materials.
- Grind the knives’ blades.
- Hone the blades.
- Strop the blades.
- Store the knives properly.
A dull knife in the wilderness will make your survival more difficult. Hence, it’s vital to know how to sharpen your knife with or without a sharpener. Keep reading to learn this essential survival skill.
1. Find Suitable Sharpening Materials
It’s better to buy a survival knife that comes with a sharpener. For instance, you can get a lightweight, effective pocket knife sharpener on Amazon or your nearest supplies store. These tools are usually made from whetstone or diamond stone and come in handy, especially when you’re not an experienced survivalist.
However, things happen, and you may forget or lose your knife sharpener during a hike or exploration expedition in the wilderness. In such cases, you’ll need to find natural knife sharpeners from the surrounding. Furthermore, you can put your creative foot forward and improvise sharpening tools from artificial objects you come across.
So, let’s have a look at practical tools that you can use to sharpen your knives in the wild:
Pocket Knife Sharpeners
These are available in different sizes and designs. Some are multi-purpose survival tools, including knife sharpeners, whistles, fire starters, and repairing rods. Others are simple devices of round, cylindrical, or rod-like shapes. While some sharpeners can fit into your pocket or key holders, others are larger and bulky.
You don’t want to carry a bulky knife sharpener in the wild. Hence, it’s best to find a lightweight, portable, and compact sharpener to carry on your adventure. For example, the Sharpal Diamond Sharpening Stone (available on Amazon.com) is a durable, versatile sharpener that you can use on knives, machetes, axes, and fishing rods. It has a double grit for both sharpening and honing.
Looking for a Knife Sharpener? These are the top sellers on Amazon
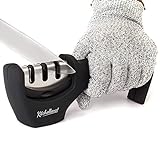
![Longzon 4-in-1 Knife Sharpener [4 stage] with a Pair of Cut-Resistant Glove, Original Premium Polish Blades, Best Kitchen Knife Sharpener Really Works for Ceramic and Steel Knives, Scissors.](https://m.media-amazon.com/images/I/41ZEyGV5cEL._SL160_.jpg)

Sanding Sticks
A sanding stick is a must-have tool for most outdoor enthusiasts, hunters, and survivalists. Sanding sticks are simply sandpaper wrapped on sticks. Although we commonly use sandpaper to smoothen (or polish) surfaces, it is also effective in sharpening knives.
While you can buy a sanding stick at the nearest hardware store or on Amazon, it’s pretty easy to make one when you have sandpaper. You’ll only need tape (duct or masking) and a straight stick to start.
So, here’s how to make a sanding stick:
Lay the sandpaper on a surface with the grit side facing down.
- Place your stick on the sandpaper.
- Wrap the sandpaper tightly around the stick.
- Tape the sand stick from top to bottom, ensuring that all the corners are neat.
- Your sand stick is now ready for use.
River Stones (Rocks)
Did you lose or forget to pack your knife sharpener? The best natural alternative to a whetstone or the diamond stone sharpener is a river stone (rock). However, though they’re readily available, they might be softer than synthetic stone sharpeners.
Still, you’re more likely to find the best sharpening stones in streams and rivers. They’re better than the rocks you collected on the ground since the water smoothens them. However, it’s advisable to search for two flat stones (rocks) and rub them together to smoothen them before use.
Glass
Did you know that glass is an effective knife blade sharpener? If you don’t have a synthetic stone sharpener and can’t find a natural stone, look for glass. And, you don’t have to search for a piece of broken glass in the wild, although it’s common to come across glass bottles people have thrown away.
If you’ve carried a jar of pickles or jam in your bug-out bag, you’re good to go. Most smooth glass surfaces, including car windows, can sharpen a knife. However, polished surfaces aren’t ideal knife sharpeners.
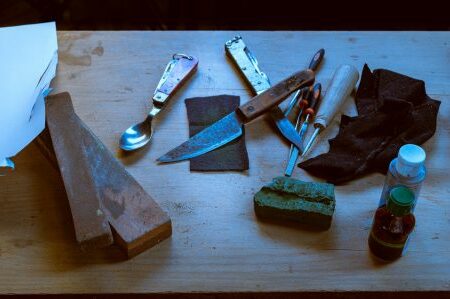
Ceramic
Since knife blades are made of steel, any material that’s harder than steel can sharpen a knife. For instance, ceramic can be handy when other sharpening materials are unavailable. Although it’s rare to find a traveler with a ceramic mug, you might come across a ceramic piece in the wild.
To sharpen your knives, you only have to run the blades over the rough side of the ceramic. You should maintain a 20-degree angle between the ceramic and the knife blade to attain an excellent sharp edge.
Steel
You don’t have to bother searching for other sharpening tools if you’ve carried several knives. You can use one knife’s blade to sharpen another – a process some call ‘steeling.’ This is because you’re using two steel blades to sharpen each other, and it’s a pretty straightforward method.
Paracord
A paracord (parachute cord) is one of the essentials in a survival situation. It has a variety of uses, including:
- Building shelter
- Making traps (or snares)
- Hanging food
- Fishing
- Lighting fires
However, you can also use your paracord to sharpen your knives.
Here’s how to sharpen a knife using a paracord:
- Tie and stretch a paracord of about 2 – 3 feet (60 – 90 cm) in length on two trees.
- Apply smooth clay mud on a section of the paracord (preferably in the middle).
- Run the edge of your knife on the muddy part of the paracord using a firm to light pressure (a few strokes will do). The mud provides abrasion, sharpening the knife’s edge.
- Run your knife on the mud-free part of the paracord to align the blade and make it extra sharp.
Here’s a YouTube video demonstrating this simple trick:
2. Grind the Knives’ Blades
After selecting your preferred (or readily) available sharpening tool, the next step is to sharpen your knives’ blades. We’ve already seen how you can sharpen your knife using a paracord. So, this step applies to the other sharpening tools.
Sharpening your knife’s blade grinds it when the edge isn’t razor-sharp. And grinding is the first step in this process. Also, most knife sharpeners, including whetstones and other sharpening stones, work best with a lubricant such as oil or water.
While purchasing a whetstone, you might also consider buying the lubricant. Honing oil is the most commonly used lubricant in knife sharpening. The liquid prevents metal shavings from your knife’s blade from clogging the sharpening stone. Moreover, the lubricant reduces the chances of more shavings coming from the edge.
Here’s how to grind your knife’s blade on a sharpening stone:
- Apply some water (or honing oil) to the flat surface of your sharpening stone. Some people prefer starting with a coarse-grained rock, moving to a moderate-grained stone, and then to a fine-grained stone. But, since these three types of sharpening stones may be unavailable in the wild, a fine-grained river stone will do.
- Rub your knife blade on the sharpening stone. There are three ways to do so: circular motion, full-length forward strokes, or forward and backstrokes. In the last method, you must apply firm pressure while moving the blade forward and a lighter force on the backward motion. Moreover, it should be a systematic motion where you stroke your knife’s edge from the hilt to the tip.
- Maintain the right angle. Your sharpening process will be futile if you position the blade at the wrong angle. So, to avoid this, keep the edge at about 15 – 20 degrees from the sharpening stone. You can use half the width of your thumb to approximate this angle. Some people also form a ramp using a matchbox book or post-it notes to measure this angle.
- Test the blade’s sharpness. Your knife’s edge should be sharp after a few consistent strokes on the sharpening stone. To test if the blade is sharp enough, slice through a piece of paper, a tomato, or a potato (or whatever is available) to see if it leaves a clean edge. If the blade is sharp, it shouldn’t leave a ragged edge. Moreover, it would help if you didn’t use a lot of pressure.
3. Hone the Edges
After confirming that your knives’ blades are sharp, it’s advisable to hone them. Honing the already sharp edges is crucial in maintaining the blades’ sharpness. You don’t want to keep sharpening your knife every day. Right?
Honing your knives’ edges will ensure they’re effective whenever you want to use them. The process also helps in aligning the blades by keeping the edges straight. For best results, honing steel is the ideal tool to use in this case.
A honing steel doesn’t sharpen a knife’s blade from scratch but retains its sharpness. For instance, Utopia Kitchen Honing Steel (available on Amazon.com) is perfect for honing knives. Although the manufacturers have labeled it a sharpening rod, the tool works best on already sharp knife edges.
The 12-inch (30.5 cm) rod is made from carbon steel with a nickel-chrome coating. Therefore, it is durable and doesn’t damage a knife’s cutting edge. Furthermore, the rod has an ergonomic handle and a non-slip rubber bottom. Consequently, it’s easy to handle and use.
Now, honing steel may not be available in the wild.
So, how do you hone your knives in an outdoor setting?
You can still use a rock to hone your knives in the wild. Although the stone will not be as effective as a honing rod, it’s the most suitable tool in a survival situation.
Here’s how to hone a knife’s edges:
- Position the knife blade at 15 – 22 degrees on the rock (stone).
- Stroke one side of the blade lightly on the stone about ten times. You can slide the knife from left to right while applying some pressure.
- Turn the knife to expose the unhoned side. Then, run it on the stone for the same strokes as the other side.
- Your knife should be optimally sharp on the tenth (or so) stroke.
Note: You can test the knife’s sharpness by cutting through paper after honing it. And it’s best to hone your knife after every use to avoid sharpening it every time.
4. Strop the Blades
You’re most likely to subject your knives to various tasks in the wild, including cutting different materials. Since some substances are harder than your knives’ blades, they can deform them. Hence, it’s advisable to strop the knives from reshaping and re-align the blades.
Stropping is usually the last step in sharpening a knife. It simply means polishing a knife’s blade to make it extra sharp. So, it would be best to do it after grinding and honing your knives.
Apart from making a knife’s blade razor-sharp, stropping improves its aesthetic. Therefore, the edge will shine like a mirror due to enhanced sharpness. While sharpening a knife requires extra hard tools, leather is the best item to use for stropping.
Therefore, don’t forget your leather belt when going for expeditions in the wild.
Here’s how to strop your knife using a leather belt:
- Tie the belt to two immovable objects (trees or rocks).
- Run one side of the knife’s cutting edge on the belt lightly, from left to right.
- Turn the blades to the other side and repeat the procedure.
- Your knife will be ready for use after twenty strokes (for both sides).
5. Store the Knives Properly
It’s futile to sharpen your knife and then have it lose its sharpness due to poor storage. Storing your knife poorly will make it dull. It can also damage it. Therefore, keeping your knife correctly when not in use is crucial.
Here are the best ways to store your knives:
- In sheaths
- In kitchen roll
- On a magnetic wall strip
Conclusion
Knife sharpening is essential as it ensures that knives are in their optimum condition. You can use different sharpening tools, although stones are the most common. The process involves a few steps, including:
- Finding suitable sharpening materials
- Grinding the knives’ blades
- Honing the blades
- Stropping the blades