Learning how to make activated charcoal is a great way to ensure that you have it on hand in an emergency situation. While the process does take some preparation and a little time to ensure that you have everything on hand and complete the process correctly, it is actually quite simple once you understand what you need to do.
You can make activated charcoal using the following steps:
- Make charcoal by burning your wood for at least 24 hours
- Grind charcoal into a fine powder and mix with a 25% calcium chloride solution
- After 24 hours, rinse the charcoal mixture, allow to dry, and then bake for 30 minutes at 250 degrees
To make your own activated charcoal so that you are always prepared to purify contaminated air, water, or remove toxins from your body, simply follow these easy steps.
Make Your Charcoal
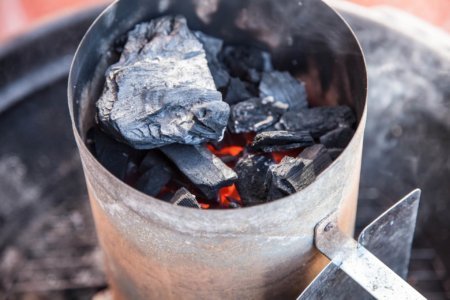
Making the charcoal that you will need for this process is one of the most important steps, as you want to make sure that you have high-quality ingredients. First, you will need to gather a large pile of hardwood that you are going to burn to make charcoal.
It’s a good idea to put the wood in a metal burning barrel or on an open spot on the ground where you can easily access it and feed the fire.
Chop the hardwood into smaller pieces so that you can fit as many as possible into the barrel without leaving a lot of empty space. Once the barrel is packed or you have a lot of wood on the ground in your burning area, then you need to start a fire, ensuring that it will burn for hours without being disturbed.
Very large piles of wood or barrels will need to burn for close to five hours, while smaller piles can burn for a shorter time, around three hours. After the fire has burned out, allow the barrel or the pile of charcoal to cool completely so that you don’t get burned.
It’s a good idea to allow the charcoal in a burn barrel to rest for at least 24 hours before trying to open the barrel, as this ensures that the charcoal is completely cool and that there aren’t any hot spots left, which can easily cause you to get burned.
Gather the Rest of Your Supplies
While your wood is burning you can use this time to gather the rest of the supplies that you will need to complete the project. Not only do you need wood, but you will also need a supply of calcium chloride, or pickle crisp.
Find a large canning jar that you can use to mix the calcium chloride in, as well as clean water, a measuring cup, cheesecloth, flat pan, and a container to store the activated charcoal when the project is finished.
Mix the Charcoal with Calcium Chloride
Once you have made your charcoal, allowed it to cool, and gathered all of the other ingredients and supplies that you will need, then you can finally make activated charcoal. The first step is to powder the charcoal into a fine, uniform, powder. This can be done with a hammer, although some people like to use a blender to speed up the process.
Once the charcoal is finely crushed and made into a powder, then it needs to be put into a glass bowl. Next, dissolve a solution of 25% calcium chloride in water. This means that you should mix 1 part calcium chloride with 3 parts water.
This will create an exothermic reaction, which will cause the jar to become hot. Slowing mixing the water and calcium chloride together will prevent burns.
Slowly add the solution to the powdered charcoal until you make a spreadable paste. Discard any leftover calcium chloride solution at this time, and then allow the charcoal and calcium chloride paste to dry for 24 hours before touching it.
Rinse the Charcoal and Bake it
Once the wet charcoal has had time to sit for a whole day, then it is time to rinse it. Only use clean cheesecloth or a clean white sheet to do this, as you want to make sure that there are no scents or detergent on the fabric that may transfer to the charcoal. Spread the charcoal out on the sheet or cheesecloth and rinse it with clean water.
The water that filters through the fabric can be saved and then filtered through a coffee filter to save any small pieces of charcoal that would be lost.
Once everything has been rinsed thoroughly, spread it out on a baking sheet and bake it for 30 minutes at 250°F. This ensures that all moisture is removed from the charcoal and that it is completely dry. At this point, the charcoal can be cooled completely and then broken into small pieces for storage in a waterproof and airtight container.
Using the Activated Charcoal
As long as the activated charcoal was made correctly and then stored in a waterproof and airtight container, such as a jar, then it can easily be used for a number of purposes. It is commonly used to create an emergency water filter, which is great in a grid-down situation where the water may be unsafe to drink, and gas mask filters.
Activated charcoal can also be ingested to help clean the body of toxins or other poisons.
Finally, this charcoal can be added to soaps to make them more efficient at cleaning and disinfecting. This is great for anyone who makes their own soap and wants to ensure that it is as powerful as possible.
As you can see, the process for making activated charcoal is fairly simple, although it does take a few days to do correctly and does require you to have all of your supplies on hand before getting started for the best results. Once you understand the process and how to make your own activated charcoal, then you can easily make this charcoal on your own, whenever you need it.
Learning how to make activated charcoal saves you time and money, as you won’t have to buy your own activated charcoal. Having some on hand ensures that you are always prepared for what may happen.