Survival food can be really expensive if you’re buying any kind of manufactured freeze-dried food, but does it have to be that way? If you’re willing to do it yourself, you can get inexpensive survival food pretty easily!
These are the best cheap survival foods you can get:
- Beans
- Rolled Oats
- Wheat
- Pasta
- Dehydrated Fruit
- White Rice
- Corn
- Lentils
- Peas
- Salt
- Sugar
- Honey
- Boullion
- Instant Coffee
- Tea
- Powdered Milk
- Instant Potatoes
Best Cheap Survival Food
Cheap survival foods are pretty easy to come across. You just need to know what to look for.
I prefer food that doesn’t need much to get it ready to store. Things like dried corn, wheat, rice, beans, etc. It just makes getting everything stored a lot faster.
This doesn’t work for everything, however. If you’re looking to store fruits and vegetables, then you’re going to have to either buy the canned version or dehydrate them yourself. Let’s take a look at the different types of survival food that I would consider cheap.
Beans – Beans make up about 1/3 of everything that I put into food storage. They’re a great source of protein, which is something that can hard to find when you’re looking for inexpensive survival food.
It’s hard to get meat that will store for long periods of time for anywhere near the cost of beans. You can pick up all kinds of beans for less than a dollar a pound and you can even order prepackaged beans for food storage for about a dollar a pound. You just can’t do that with many other sources of protein.
White Rice – White rice makes up another 1/3 of the food that I store. It’s super cheap and has the calories to keep you going in a survival situation. You can buy about three pounds of white rice for a dollar!
Try to stay away from brown rice. It has more nutrients than white rice but the oils in it make it go bad in a matter of months instead of a couple of decades.
Rolled Oats – Rolled oats are a great dry staple for cheap food storage. They last just as long as rice and beans when they’re properly stored and they only cost about 60 cents a pound if you look around online.
You want to store rolled oats and not steel cut or instant oats. Rolled oats can last for 30 years where steel-cut or instant oats are only good for about 5 due to the way that they’re processed.
Wheat – I store both hard red wheat and hard white wheat. These can be ground down with a hand grinder to make flour for different types of baking.
Hard white wheat will produce a lighter, fluffier bread that looks more like what we’re used to today. Hard red wheat is going to make a more dense, and slightly bitter bread. Both are great for storing for a survival situation and they only cost about a dollar a pound.
Pasta – Pasta is one of the great comfort foods. It’s filling and has plenty of calories for when you may have to do physical labor all day.
It also stores for a long time and is really cheap. When it’s properly packaged it can last up to 30 years. Different types of pasta can be found for 50 or 60 cents a pound.
Dehydrated Fruit – Fruit is a great treat when you’re stuck eating mostly rice and beans every day. The cheapest way to store a lot of dried fruit is to grow the fruit yourself and dry it in a food dehydrator. This is a good way to keep fruit from going to waste if you have a tree that’s producing way more than you can eat.
Another option is to just buy the fruit already dried and packaged. It’s going to run you between $4 and $12 a pound depending on what you get. For some of the more exotic fruits, this is probably the best way to get your hands on it.
Corn – Corn is going to cost you 60 – 80 cents a pound. You can grind it up to make cornmeal or tortillas and soak it to rehydrate it and eat it whole.
Corn can be found for even less in feed stores. Keep in mind this is technically for animals so it doesn’t go through the same screening process as other types of corn packaged for human consumption.
Lentils – Lentils are a lens-shaped legume that many people eat for their high fiber and magnesium levels. They are a complex carbohydrate.
Lentils that aren’t packaged for long term food storage will normally keep their color and flavor for about 2 – 3 years. When they’re properly stored in bags with oxygen absorbers inside of plastic buckets, they can last for 25 years. Bulk lentils can be bought for about 35 cents a pound online.
Peas – Dried peas are another great food to store for emergencies. They usually cost about $1-$2 per pound but you can find them as low as 70 cents a pound in bulk.
Peas have been stored for most of history since they last for a long time (up to 25 years if stored properly), have a wide range of vitamins and provide a lot of calories. They’re also great for creating hearty soups and other meals that can help raise spirits when food is scarce and times may not be great.
Salt – Salt is one of those things that is super cheap now and will become extremely valuable if there’s ever a long-term disaster. It’s good to season all those rice and beans, but it can do a whole lot more. Salting meat was one of the original ways to preserve it and if we ever lose access to modern refrigeration, it’ll become common again.
Right now you can get salt for about 40 cents a pound. Store a lot and store it often.
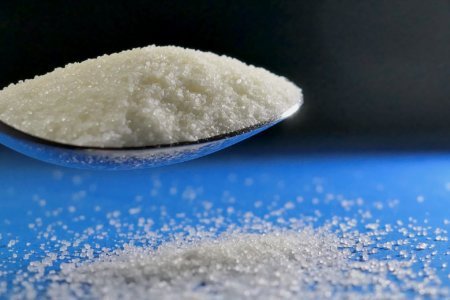
Sugar – Sugar is another modern miracle. It makes our day-to-day life so much better and costs almost nothing. This will change if you ever need to start using your food storage for real.
After about 20 seconds of looking online, I found 10-pound bags of sugar for $4. You can’t beat that for something that can bring a lot of joy following a disaster. It’s also useful for curing meats and doesn’t really go bad.
Honey – Honey is a great sweetener for food storage. It basically never goes bad and can add a lot to meals after a disaster.
This is probably the most expensive item on our list. If you’re willing to purchase large amounts of honey then you can get some really good deals. Outside of that, you’re looking at about $12 for 5 pounds. It’s still a good deal but not as good as other food items on this list.
Powdered Milk – The only way to really get milk for long-term storage is by buying powdered milk. It typically costs about $4 – $5 a pound which will give you about 15 – 8oz cups of milk. You can expect powdered milk to last around 10 years in an unopened container.
Instant Potatoes – Instant potatoes are another great staple food to add to your food storage. You should be able to find them for about a dollar a pound and they can last for 25 years if you package them in buckets with oxygen absorbers.
Bouillon – Bouillon can basically last forever as long as it still tastes good and doesn’t have anything obviously wrong with it. The best part is it’s really cheap and tastes good. It can go a long way toward making bland foods taste much better. I’d highly recommend adding some to your food storage!
Instant coffee – Ground coffee can last for about 5 or 6 months on the counter or up to 2 years if you freeze it. Instant coffee can last for 20 years if you package it right and that makes it a great addition to long-term food storage.
If you’re a coffee drinker this could make an otherwise horrible situation seem slightly more normal. For about $5 per 80 servings, it makes sense to store some regardless of your coffee preferences.
Tea – Tea is another comfort item that’s going to give you a little escape. Black teas are fully fermented and last around 2 years before they start losing their flavor. Green tea should last for about 18 months before it starts losing its taste.
The good thing is it won’t go bad if you store it in a cool dry place, so you can use it as long as you like. You can easily find 100 tea bags for $6 or less.
How to Make Long Term Food Storage
One of the best ways to save money on survival food is by having it last for as long as possible! The best way to do this is through the proper storage and packaging of your food.
Where to Store Your Food
Where you store your food is one of the things that people sometimes overlook and it can be as important as how you package your food. The best places to store your food storage are going to be cool, dry, clean, and away from sunlight. For most people, this ends up being in areas like the basement or a cellar.
When you don’t have access to one of these areas you need to start getting creative. This is really true if you live in an apartment or another area that doesn’t have a ton of space.
You can try all of these locations:
- Kitchen
- Basement
- Under the Bed
- Closets
- Living Space
- Under Furniture
- Under the Stairs
- Dead Space
- Laundry Room
- Water Heater/Mechanical Room
- Crawlspaces
- Garage
- Campers and Boats
- Sheds
- Window Wells
- Caches
- Bug Out Location
Packaging Your Food
To store your food for as long as possible, you’re going to need to package them as securely as possible so pests and bugs don’t get inside. You’re also going to want to prevent oxygen, sunlight, and heat from damaging it. To do this you’re going to need plastic buckets, mylar bags, and oxygen absorbers.
Food Grade Plastic Buckets – Food grade plastic buckets are what we’re going to be looking for when we store our food. These are mostly going to be Resin Identification Code (RIC) #2, but you can use RIC #2, 4, and 5 for food or water storage. You can tell what type of plastic you have by finding the triangular symbol with a number inside. It looks a lot like a recycle symbol.
I prefer to just buy new buckets when I’m storing food, but you can find used buckets from restaurants and bakeries for really cheap or even free. Just be sure that you clean them well before you use them.
Usually, I use Gamma Seal Lids for my buckets but they’re expensive and really aren’t needed. They do add a level of convenience that you otherwise don’t have from normal plastic lids.
The important thing to look for with any lids that you want to be as airtight as possible is a good rubber gasket. It’s not necessary if you’re going to seal your food in a mylar bag but it does help keep the smallest bugs out and I consider it to be required when you’re storing foods that don’t need to be sealed in a mylar bag.
You can find buckets in all sizes but I normally just use 5-gallon buckets. Some people like to use smaller buckets for things like spices or other foods where you won’t normally fill a full 5-gallon bucket. One of the better ways to get around this is by using smaller mylar bags for these items and then putting those smaller bags inside of a 5-gallon bucket.
Mylar Bags – Mylar bags are made from a PET resin and technically refer specifically to a DuPont product. These days, Mylar pretty much refers to any plastic bag that can be sealed with heat to keep the items inside dry, and oxygen-free.
For food storage, Mylar bags are great because we can seal them which makes an airtight and watertight barrier around our food. They also keep sunlight and bugs out, which helps keep food for even longer. You’ll get a little bit of protection from rodents and other small animals but they can chew through the bags pretty easily.
This is why we put our sealed Mylar bags into buckets.
When you’re choosing Mylar bags for food storage, make sure that you don’t go for the cheapest bags you can find. You need to be sure that you’re getting quality bags that won’t let light inside and won’t puncture easily.
I normally buy these mylar bags because they’re 4.3 mils thick and also come with oxygen absorbers. I don’t recommend going any thinner than 4.3 mils. The thinner bags can let light in and get punctured by certain types of food like pasta and even rice!
To seal the mylar bag you can use a heat sealer specifically made to seal them or you can just use a clothes iron or hair straightener. I use an old iron.
Oxygen Absorbers – Oxygen absorbers are packets of finely ground iron that remove oxygen from the air. In food storage, they’re placed inside of a Mylar bag before it gets sealed to remove the oxygen from your food. This can significantly increase the shelf life of most foods.
The real question is what size do you need to for different size mylar bags? I use 2000 cc oxygen absorbers for 5-gallon mylar bags, 500 cc oxygen absorbers for 1-gallon mylar bags, and 300 cc oxygen absorbers for 1-quart mylar bags.
These are total ccs so you can use two 1000 cc absorbers for a total of 2000 ccs or four 500 cc absorbers.
You can look around and you’ll see various equations that say you should use more than that for 5-gallon and 1-gallon bags, but I’ve never had a problem with food spoiling earlier than I expected because of an oxygen absorber. I really have only seen problems when the seal isn’t done properly or a really thin Mylar bag gets punctured.
If you’re worried about oxygen absorber sizes, you can add as many as you want without any negative effects.
How to Package Your Food (Step by Step)
Salt, Sugar, and Honey – You don’t need to put salt, sugar, or honey in a Mylar bag.
Salt and sugar just need to be placed in a sealed bucket to make sure that bugs don’t get into them and to keep most moisture away from them. As they sit, they’ll begin to clump or even become solid blocks inside the buckets. Just break them up and they’ll be good to go again.
I leave honey in the container that it comes in (I normally only buy honey in a sturdy container). Over time it’ll start to crystallize but this doesn’t mean that it’s gone bad. You can gently heat the honey and stir it to get rid of the crystals before you use it.
Step 1 – Line the bucket that you’re going to fill with a mylar bag and fold the top of the bag over the edge of the bucket. Do this for every bucket that you plan to fill.
Step 2 – Fill each bag until it’s about 4″ from the top, then pick the bucket up and bang it on the floor a few times. If the food has settled in the bucket, fill it back up to the 4″ mark.
This compacts the food into the bucket and removes any extra air that you may have trapped inside.
Step 3 – Label the bag and the bucket with the contents and the date that you sealed it.
Step 4 – Heat up your bag sealer. For hair straighteners and irons, turn them up to the highest setting.
Step 5 – Seal the bag almost all of the way across leaving a gap large enough to fit your oxygen absorbers.
When sealing buckets with an iron I lay a 2×4 across the top of the bucket and use that like an ironing board to seal the bag. Just smooth the bag out over the 2×4 and iron until the bag is sealed.
Step 6 – Open your oxygen absorbers and place them into each bag that you’re preparing. Make sure that you keep your oxygen absorbers sealed until this point. If you open them early, they’ll start absorbing oxygen from the air around you and will lose their potency really quickly.
Step 7 – Push the bag down to force out as much air as you can and then seal the last opening in the top of the bag. Quickly seal any other bags that you’re preparing as well.
Step 8 – Inspect the bags to make sure they’re completely sealed. If you find any that aren’t sealed well you can finish sealing them now. Do not put the lids on the buckets yet.
Step 9 – Wait several hours (I usually wait until the following day) and check the bags to make sure that they are sealed and the oxygen absorbers are working correctly.
If everything is going well, they’ll have a sucked-in, almost vacuum-packed appearance. This is from the oxygen absorbers removing the oxygen from the air inside the bags.
At this point, you can put the lids on the buckets and seal them up.
Related Questions
How much food should you have stored? The Department of Homeland Security recommends that you have at least 72 hours’ worth of food and water stored for each person in your home. The Mormon church recommends that you go much farther than that and store a full year’s worth of food. One year is also what most preppers recommend as well.
Is peanut butter a good survival food? Peanut butter is a good food during survival situations. It has a lot of calories, can be used in baking and most people enjoy the flavor which makes it a good morale booster. Its 1.5 to 2-year shelf life means that it will be good for quite a long time.